Tip of the Week - Keying
This is the first entry of many more keying techniques. I will be going back and talking about some other beginner tips in the future as well. Since there are a wide variety of keying methods out there, and a plethora of different softwares, I'll give an overview of keying in this weeks tip, using a perfect greenscreen! Now, isn't that great? How often do you get to key with a perfect greenscreen! Future tips will deal with very harsh greenscreen and bluescreens.
Why use greenscreen instead of bluescreen? Why not just use black? or maybe even red or orange? These colors ALL can be used in this day and age. Any color can be keyed. Chromakeying is the new hotness.The reason blue and green are often chosen is because they clash wildly with the foreground subjects. This makes for a fairly easy key. You wouldn't want to key a greenscreen located on green grass! Let's take a look at Ms. Spelling below.
My, what a nice, simple key! This key can be straightfoward to create in any compositing package. Just by selecting the color and using it as a matte, we achieve this result. Be mindful, there are no integration effects with this composite. Those I will go through at a later date. Download these images and try you hand at creating this layering. A over B equals C.
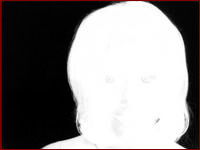
Often you may look at the resulting matte from your key and see this. There might be some black eating through the foreground subject.

You can solve this problem by adjusted your white point of your matte. Often there is a setting called screenRange, or foreground matte, or white point. Depending on your software package, most of these will accomplish the same thing, which is finely adjusting the amount of, in this case, green eating through.
Stay tuned for next week when I go over a harsh blue screen key with fur!

|

|

|


Leave a comment