Tip of the Week - Atmosphere
Not in the film sense (the atmosphere of the bar was gritty and evil), but in the natural sense (the atmosphere in the area looks bad because of pollution).
Even though as compositors we work on a 2D image, we try to convey three dimensions through tricks to fool the eye. Some compositing packages allow for creating the visuals in true 3D, like flame* or Nuke.
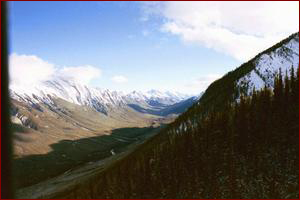
A tip to compositing shots that deal with extreme environments is to look at the depth of the image. When you look out across the plains, into the mountains, across the bays, you'll find that as you look farther away, everything becomes smaller, more desaturated, maybe foggier. Depth, atmosphere, and perspective all play a role in creating the scene. These ideals must be carried over when recreating a visual in the computer. Matte painters deal with this all the time; making things look far away by altering the perspective lines, desaturating the picture. As always, reality is your best reference. So get outside and check it out.
You can simulate this reality by adding atmosphere to your scene. Several different methods are available, and it all depends on your timeframe and resources. A very quick way of adding atmosphere is to throw a ramp from black to white on your image, skewed so the white end is further away from you. By desaturating the original image through this black and white ramped mask, you will see that the further away your image is, the less saturated it becomes. Adding a slight haze over this image can be accomplished by mixing in a little blue into the black/white ramp, and layering that over the image again.
You can break this down even further, by using Z-depth renders from your 3D package. If your composite is completely 2D in nature, you can try creating roto to separate the farther reaches of the shot.

Leave a comment